Our system have 2 type of customers, which is lead customer (hasn't yet signed up formally) and registered customer (completed key in IC/Passport). Since we are unsure which one you are referring to, please refer to the following workaround for both methods.
Option 1 - registered customer:
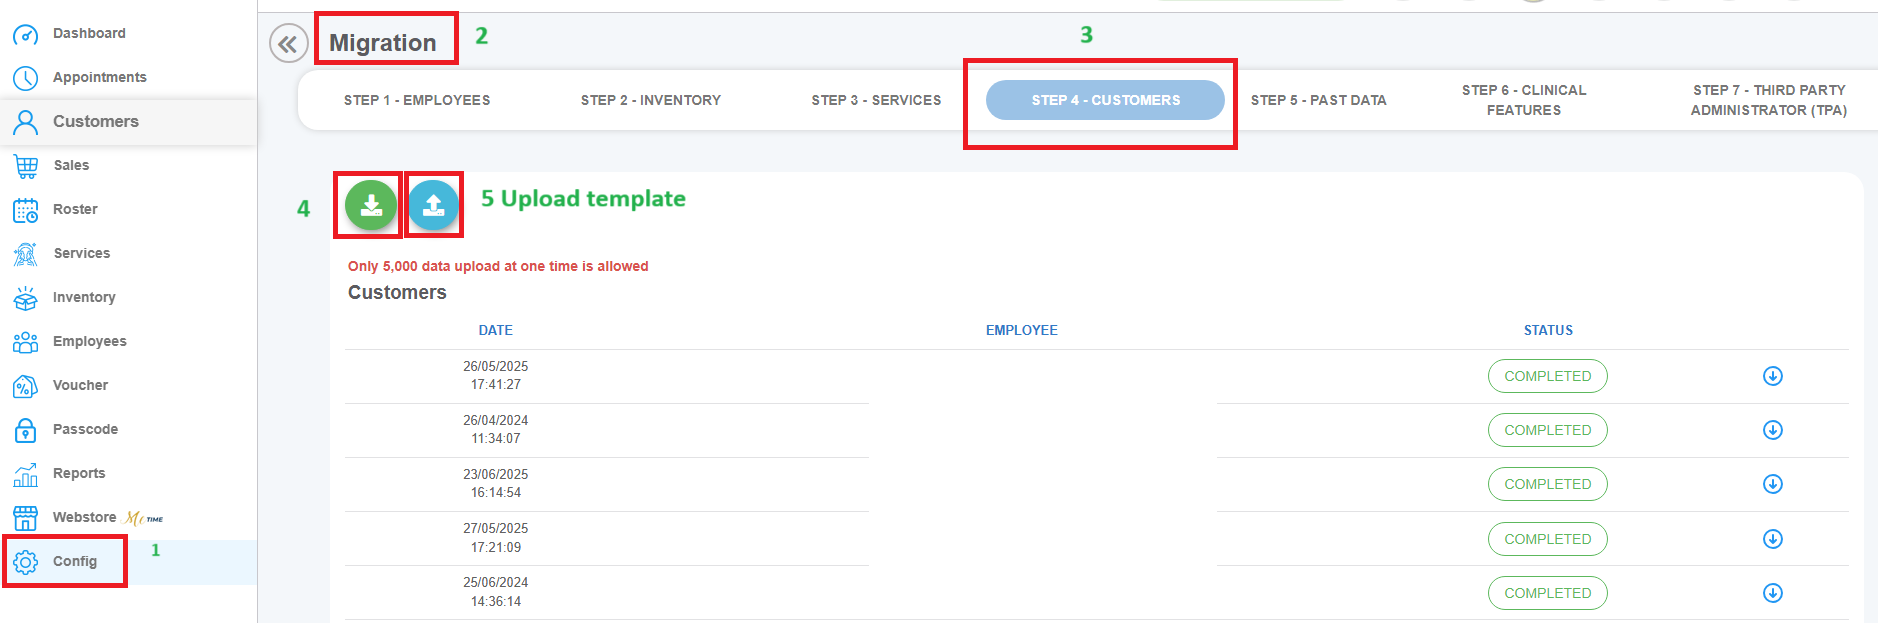
Here’s a general step-by-step guide to download the template and upload registered customer list template into a system.
To Download the Customer List Template
1. Navigate to the Config Page
Look for left sidebar navigation “Config”
1. Navigate to the Config Page
Look for left sidebar navigation “Config”
2. Go to 'Migration' module -> Click 'Customers'

3. Look for 'STEP 4 - CUSTOMERS' tab
4. Click the Download Migration Template icon (Green Colour)
The downloaded file will be in Excel format (file name: Customers_xxxx.xlsx)
Remarks: Those column name start with asterisk (*) are compulsory fields.
5. Perform upload the filled customer migration file into the system
After done fill in the customer migration template, click 'Upload migration file' icon (blue colour). Successful uploaded will shown status 'COMPLETED'.
Remarks:
- Required to resolve fields with highlighted in red
+++++++++++++++++++++++++++++++++++++++++++++++++++++++++++++++++++++++++++++++++++++
Option 2 - lead customer:
Adding Customer Lead via file upload(Excel File Template):
- Go to Customers (left sidebar navigation -> 'LISTING' tab -> LEAD MANAGEMENT

- Click on the blue download button in Assigned Customer Lead, Unassigned Customer Lead & Completed Customer
- Click on the 'Download' icon
 and the template will start download
 - This is what the template looks like

- If you wish to edit the telephone number, there is a requirement format you can hover to reference on.

- You may select the Source from the drop down list

- You may select the Outlet from the drop down list

- You may select Employee from the drop down list

- Then save the file.
- To upload lead migration file:
- Click on the 'Upload' icon
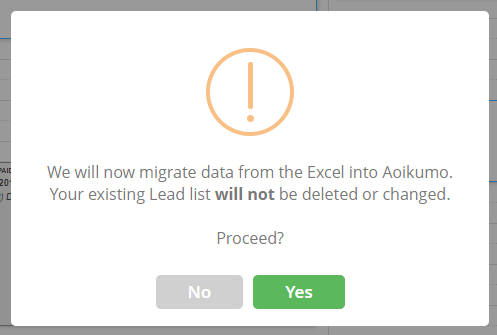
 and you may upload the file.
 - The system will pop up an alert message to ask you for proceed. click to cancel the proceed or click to proceed.
- After successful migration, the new leads that has staff assigned to them will be listed will appear in the Assigned Customer Lead tab, new leads that are not tied to any staff will be listed in the Unassigned Customer Lead tab.